

You may remember that I posted few weeks ago about our venture into urban chicken raising and the cute little puffballs that got us to finally commit. Well, they've been living in a crate in my office since then, growing like crazy, and stinking to high heaven.

We've been very busy trying to get a coop built for them outside and I'm happy to report that it's finally done!
We studied lots and got ideas from a great website called Backyard Chickens. Many of the ideas and practical details for our coop came from others that we saw on this site. The following is a step-by-step summary of what we did:

First we decided where to place the coop, which is under a huge rhododendron bush (almost a tree) in the back corner of our yard. It gets sun and shade at just the right times of day. We plotted out the space and dug a trench just slightly larger than the perimeter of the coop.
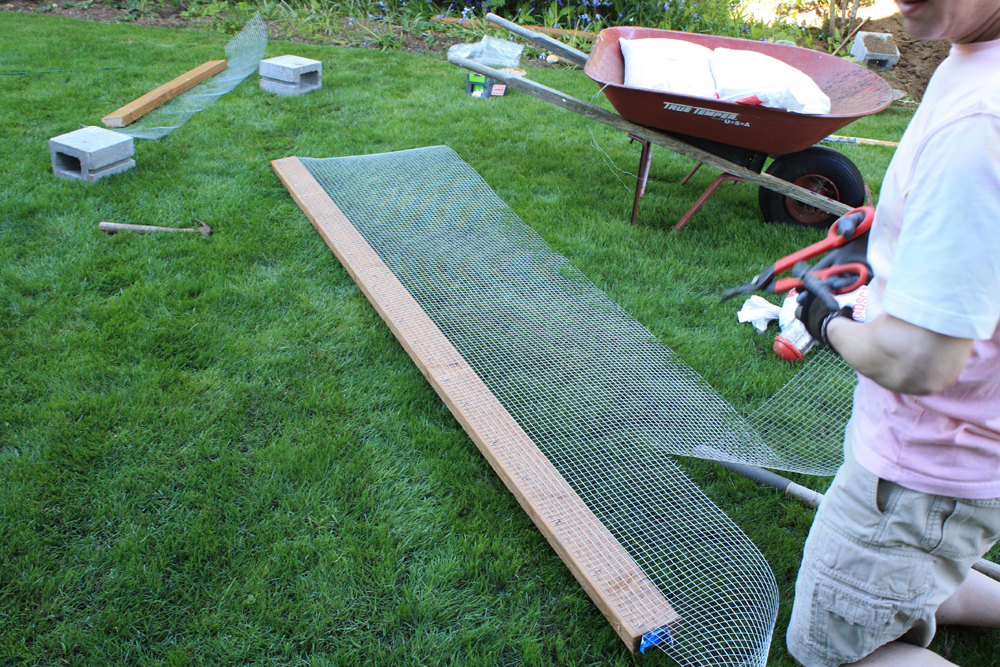
We used treated wood and cinderblocks for the foundation. We attached galvanized wire mesh to each of the four base boards.

We set the treated boards on top of the cinderblocks and leveled everything with the help of pea gravel. The wire mesh looks sort of like a bedskirt that surrounds the foundation, under the soil. It keeps predators and pests like raccoons and rats from being able to dig under the coop and get to the chickens or the eggs. We also tossed a goodly amount of pea gravel in around the base to help keep any diggers out.
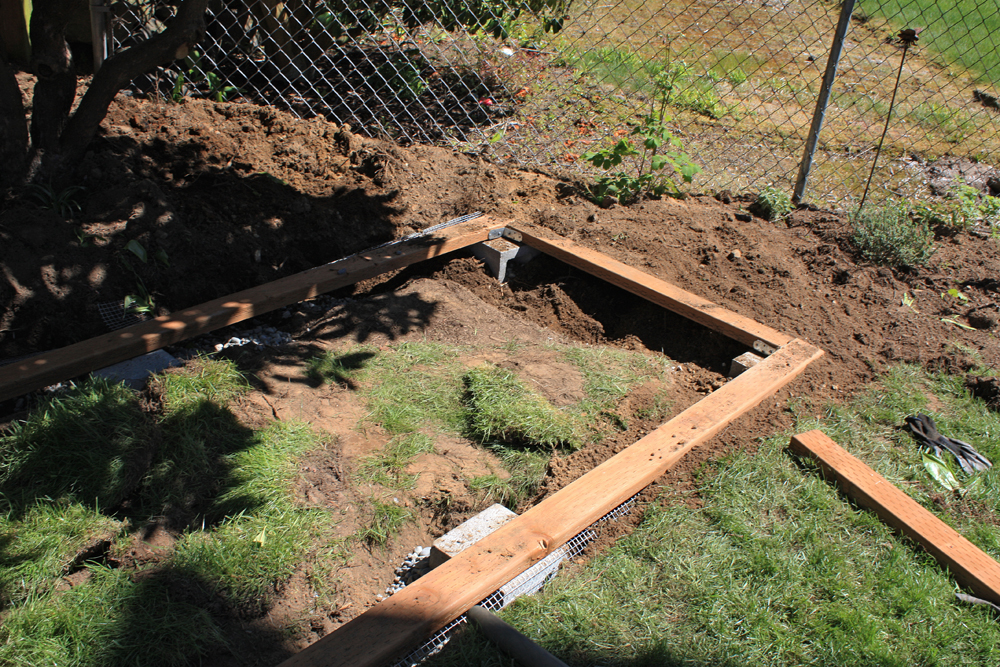
Then we filled in the soil all around and leveled the ground that was inside of the coop foundation boards. This made a nice even, clean surface for us to fill later with bark and wood chips.

Next I kept a hose running over the whole thing to make it nice and muddy. This allowed me to continue squishing soil down into all the cracks and crevasses and pack everything in tight. I did this whole bit barefoot. It was pretty fun, actually.

Now we could get started on the framing. My husband built each of the four sections separately and attached the wire mesh while they were lying flat on the ground. I think this was much easier than trying to do it after they went up. The one thing we regret was that we didn't do the wood staining before the mesh went on. That became a lot harder to do later and doesn't look as clean as we would like, but oh well. These aren't royal chickens or anything.

We decided to use metal brackets for many of the joints. This was partially because it's easy, and partially because we really liked the way it looked with a mixture of wood and metal together. It cost us more, but I suspect this may be the only chicken coop we'll ever build, so the splurge was OK with us.

Here's a picture of all four walls framed. Next came the floor for the interior portion of the coop, followed by the solid walls that enclose the roost and nesting area.

We added the pass-through doorway and some ventilation holes on the back side. Those holes were later covered with wire mesh.

This shows the nesting boxes that hang off the back end. We later added trim on the inside so that the chickens have to jump over a little ledge to get into their egg-laying space. Apparently they like it dark and cozy and separate from the rest of the coop area.

By this time in the process they were getting quite large. Did I mention that they smell bad? Sheesh. I needed them out of the house in a bad way.

Here you can see the finished front with both doors and a window, which is covered with wire mesh. I read that chickens need lots of ventilation because they produce a ridiculous amount of ammonia gas. No kidding!

Let me just go on public record here and say that my husband's carpentry skills impressed me quite a bit during this project. We had a great time working together. The kids were a help too.

The doors swing beautifully and the whole thing is incredibly solid. Nothing cattywampus here!

The last steps were to add the galvanized metal roofing and a nipple-watering system underneath in the walking area, then stain the whole thing.
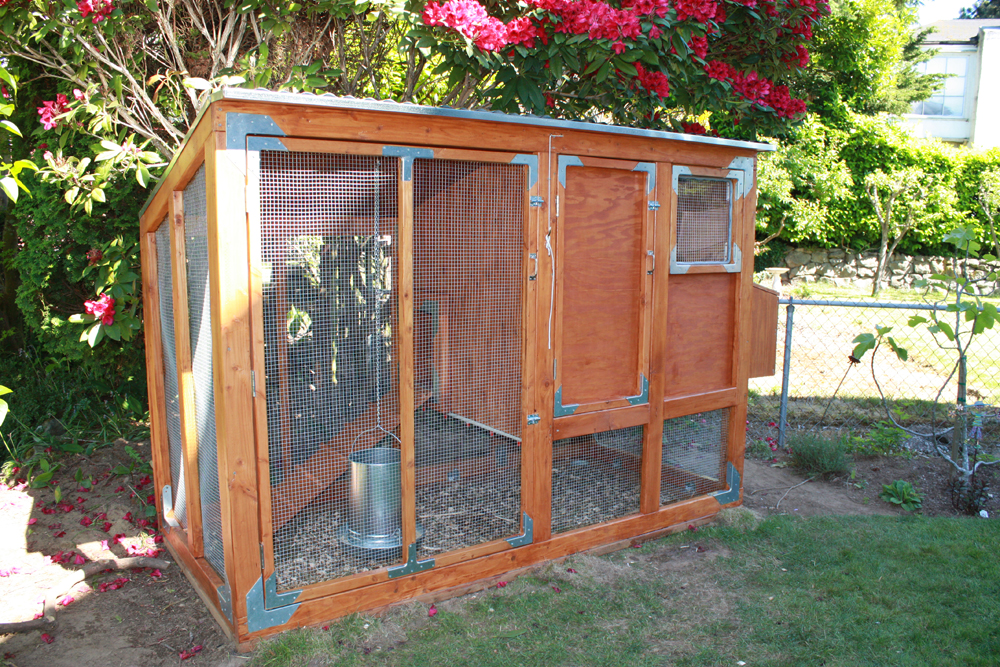
Viola!


You can see the little pull string attached to the pass-through door. We can easily open and close it from outside the coop this way.

You might also be able to see in this picture that we have a piece of plexiglass with a foam "bumper" hot-glued on around its edge. This can be slipped into the window opening if the temperature is too low, but still lets in light.

All we have to do to gather eggs is lift the nesting box lid and reach inside. That strange edge detail was the result of trying to use some scrap wood, not some other practical purpose. Maybe the hens will be able to visit through the opening while they're busy laying though. I bet chicken chatter increases egg productivity.


I think they like it!
78 comments:
Well, they SHOULD like it -- the Ritz-Carlton of coops!
That is amazing!!!!!!!
I think it will take long time to build a chicken coop by myself. But, i will try myself and ll let you know about my progress.
property in islamabad is website about property in lahore, property in islamabad, property in karachi, Dha Property, and Bahria Property. It is a home and real estate market place dedicated to helping owners, buyers, sellers, renters, real estate agents, mortgage professionals, landlords and property managers find and share vital information about homes, real estate, mortgages, and home improvement.
dha islamabad
You did a great job! I would like to build one similar to this but out of mostly pallets. I'm just curious of the size on yours. I'm not sure how tall to make ours.
Is this house still working for you? Found on Pinterest and am interested in builing similar. Would you share rough dimensions, please? TIA.
I made mine similar to this .the coop size is 4x8 and total run and coop is 8x12. We leave the inside door open and they can go in and out as they please. We built on cement and I use sand in the run and coop. They also have a 10 by 20 attached outside run with mulch.nothing has gotten in at all. The nesting boxes are inside at the lower end of the coop. I have a door I can open to get the eggs. The coop is off the floor 30 inches which gives them more room in the run. 7 chickens.
This blog in very informative for us
New Mehndi Designs best shot of her life; be it an Indian Full Hand Bridal Mehndi or be it a bride from a different country.
Your post is very nice.
Wish to see much more like. Thanks for sharing your information.
This is an awesome post. Really very informative and creative contents.
Thanks for sharing valuable information.
Will surely come and visit this blog more often. Thanks for sharing.
That was an excellent article. You made some great points.
I am grateful for for your information! Take care!
I think your writing is the cleanest I’ve ever seen.
I would like to refer to your article on my blog and write it.
I finally found great post here. Thanks for the information.
I feel strongly about it and really enjoyed learning more about this topic.
Pretty! This was an extremely wonderful post. Thank you for providing this info.
This is the right site for everyone who would like to find out about this topic.
Hello there! This post could not be written any better!
Your post is very interesting to me. Reading was so much fun.
This website and I conceive this internet site is really informative.
I want to to thank you for this good read!! I definitely enjoyed every little bit of it.
THIS KIND POST IS VERY HELPFUL TO EVERYONE JUST LIKE ME.
Thank you for selecting out the time to speak about this
I’m pretty an awful lot thrilled together with your exact paintings.
Cool post. Thank you so much!!
Its opportunity are so fantastic and working style so speedy.
Keep up the good work and thank you again.
Great delivery. Solid arguments. Keep up the good effort. Keep on writing
Great site and a great topic. I'm amazed to read this. It's excellent. Write more
I like this weblog very much, Its a really nice position to read and get info.
Hello my loved! I wish to say that this article is awesome, this is great written
It's really a nice and helpful piece of information. I am happy that you shared this
Keep up the good writing. please visit our beautiful website, spread the love, thankyou
Fantastic website Lots of useful information here.
I appreciate your sweat as well.
Thank you for sharing your info. I truly appreciate your efforts and I will be waiting for your further post thanks once again.
Amazing content. Thanks for sharing.
I really liked it. I feel too good to read it this awesome blog. I am very happy to read.
In NURS-FPX-4055 Assessment 2 students are required to analyze a healthcare issue, assess leadership approaches, and propose evidence-based solutions that improve team performance and patient outcomes. The assessment emphasizes skills such as conflict resolution, effective communication, resource management, and fostering collaboration among healthcare professionals.
Damn! I'm in love! It's beautiful!
I am absolutely loving your gorgeous blog!I love this blog.Thanks for sharing.
This is a topic that’s near to my heart
Nice post.
Fantastic beat !
This is indeed an interesting read. .D.
This blog valuable extra impressive and exceptional .D.
Please keep me posted. D.
I thank you for this meditating content. .D.
Please update more. .D.
This was truly a useful publish. Thanks a lot .D.
Really nice post! .D.
Well this article is great. I need this article. Thanks. great share for us... MM
I am glad to discover this page. Thank you that I had a great read!... MM
Thank you for sharing nice information here. Keep it up Keep on sharing... MM
Yes i am totally agreed with this article and Excellent way of writing this issue... MM
I think We all wish to thank so many good articles you provide here, thanks... MM
I am waiting for your next valuable post. Keep on sharing many us support you... MM
I have read this article; it is very informative and helpful for me. Great job you did... MM
This is an excellent post I seen, thanks that you share it with us very good... MM
Thank you ever so much for your blog post. Really thank you! Really Cool... MM
Appreciate you sharing, great article post. Much thanks again. Fantastic... MM
Muchos Gracias for your post. Really looking forward to read more. Want more... MM
This sort of clever work and reporting!
Keep up the superb works guys I've included you guys to my blogroll.
Great perception you've got in this, it's nice to find a internet site that info so much statistics about distinctive artists.
You may have severely made it less difficult for lots folks that seem to test web page and provide those parents usefull data and records
Really appreciate you sharing this blog.
This article is so nice and I am waiting for such articles
The explanations stay focused and relevant.
This reads like careful observation turned into insight.
The pacing allows ideas to sink in.
This helps explain long-term behavior clearly.
This feels grounded rather than speculative.
Post a Comment